Networking
As a software developer, your work constantly relies on networks. Whether you're pulling code from a Git repository, making calls to a third-party API, connecting to a database across the room or across the country, or deploying your application to cloud servers, network connectivity is the invisible thread tying it all together.
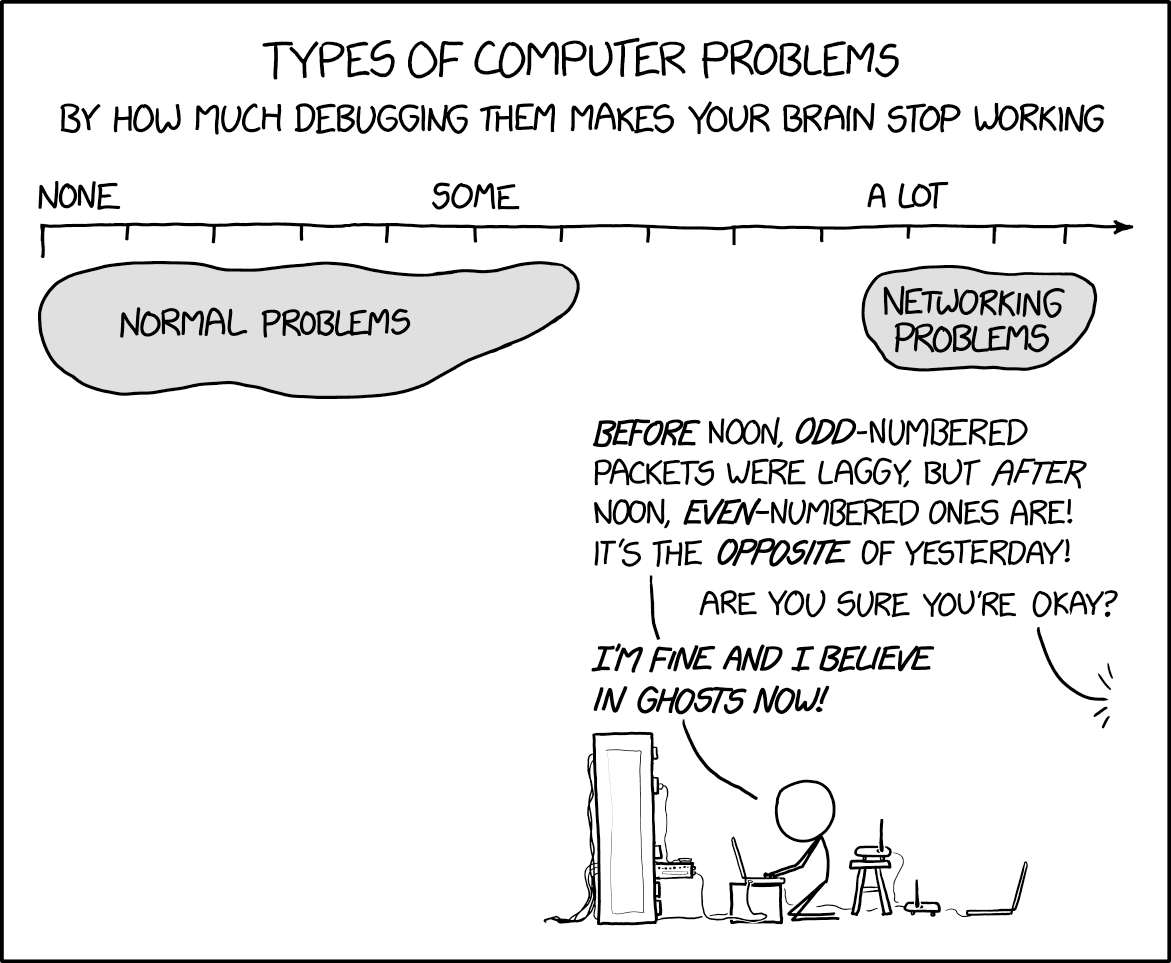
Because this reliance is so fundamental, network problems can be significant roadblocks. When services become unreachable, APIs return strange errors, or deployments fail, understanding the underlying network behavior is crucial. This section aims to demystify network troubleshooting by providing you with both the foundational concepts and the practical command-line tools needed to diagnose common issues.
Network Stack / OSI Model
Computer networking involves many complex interactions. To make sense of it all, we use layered models, like the seven-layer OSI model, as a conceptual guide. While real-world systems blend these layers, the model provides a framework for isolating problems during troubleshooting.
-
Layer 1: Physical: This deals with the actual hardware transmitting the signals – Ethernet cables, fiber optics, Wi-Fi radios.
- Troubleshooting Focus: Is the cable plugged in securely? Is the Wi-Fi connected and the signal strong? Are there physical hardware failures?
-
Layer 2: Data Link: Manages communication within a single local network segment (like all devices connected to the same Wi-Fi router or Ethernet switch). It uses MAC addresses (unique hardware identifiers).
- Troubleshooting Focus: Can my machine communicate with the local router? Are there issues with the network switch? (Tool:
arp)
- Troubleshooting Focus: Can my machine communicate with the local router? Are there issues with the network switch? (Tool:
-
Layer 3: Network: Handles addressing and routing between different networks using IP addresses. This is where the internet lives.
- Troubleshooting Focus: Does my machine have a valid IP address? Can it reach the destination network? Are there routing problems along the path? (Tools:
ip addr,ip route,ping,traceroute)
- Troubleshooting Focus: Does my machine have a valid IP address? Can it reach the destination network? Are there routing problems along the path? (Tools:
-
Layer 4: Transport: Ensures data gets delivered reliably (or not, depending on the protocol) to the correct application process on the destination host. It uses protocols like TCP and UDP, along with port numbers.
- Troubleshooting Focus: Is the correct port open on the destination? Is a firewall blocking the connection? Is the expected service (like a web server) actually running and listening? (Tool:
ss)
- Troubleshooting Focus: Is the correct port open on the destination? Is a firewall blocking the connection? Is the expected service (like a web server) actually running and listening? (Tool:
-
Layers 5-7: Session, Presentation, Application: These higher layers manage communication sessions, handle data formatting (like encryption/decryption with TLS/SSL, or character encoding), and define the specific protocols applications use to talk to each other (like HTTP for web, DNS for name resolution, SMTP for email).
- Troubleshooting Focus: Is the application server responding correctly? Are there DNS resolution errors? Are there issues with TLS certificates? Is the application itself misbehaving? (Tools:
dig,curl, browser developer tools)
- Troubleshooting Focus: Is the application server responding correctly? Are there DNS resolution errors? Are there issues with TLS certificates? Is the application itself misbehaving? (Tools:
A critical point for developers is that Layers 2 through 7 are implemented primarily in software within the operating system kernel, system libraries, and the applications themselves. Only Layer 1 is purely hardware. This means network functions are susceptible to the same issues as any software: bugs, configuration mistakes, resource limitations, and security vulnerabilities. Thinking in layers allows you to systematically ask: "Is this a physical connection problem (L1), a local network issue (L2), an internet routing problem (L3), a transport/port issue (L4), or an application-level fault (L7)?"
Adressing and Transport
For devices to find each other across the the internet or even a local network, they need unique addresses. This is the role of the Internet Protocol (IP) at Layer 3.
IP Addressing (Layer 3)
You'll primarily encounter two versions of IP addresses:
- IPv4: The older format, written as four numbers separated by dots (e.g.,
192.168.1.101or8.8.8.8). While still widely used, the available pool of unique IPv4 addresses is largely depleted. - IPv6: The modern format, using longer hexadecimal numbers separated by colons (e.g.,
2001:db8::1). IPv6 provides an almost unimaginably large number of addresses to accommodate future growth.
Parsing ip addr show Output
The ip addr show command (or its shorter alias ip a) allows for inspecting the IP addresses and network interfaces on your Linux system.
$ ip addr show
1: lo: <LOOPBACK,UP,LOWER_UP> mtu 65536 qdisc noqueue state UNKNOWN group default qlen 1000
    link/loopback 00:00:00:00:00:00 brd 00:00:00:00:00:00
    inet 127.0.0.1/8 scope host lo
       valid_lft forever preferred_lft forever
    inet6 ::1/128 scope host
       valid_lft forever preferred_lft forever
2: eth0: <BROADCAST,MULTICAST,UP,LOWER_UP> mtu 1500 qdisc fq_codel state UP group default qlen 1000
    link/ether 02:42:ac:11:00:02 brd ff:ff:ff:ff:ff:ff
    inet 172.17.0.2/16 brd 172.17.255.255 scope global eth0
       valid_lft forever preferred_lft forever
    inet6 fe80::42:acff:fe11:2/64 scope link
       valid_lft forever preferred_lft forever
Here's how to interpret the key parts for each interface block (like 1: lo: or 2: eth0:):
1: lo:or2: eth0:: The first number is the interface index. The name follows (lois the special loopback interface for local communication;eth0,ensX,enpXsYare common names for Ethernet interfaces;wlan0orwlpXsYfor wireless).<LOOPBACK,UP,LOWER_UP>: These are flags indicating the interface's status and capabilities.UP: The interface is administratively enabled (often controllable viaip link set eth0 up/down).LOWER_UP: The physical layer (Layer 1) is connected and active (e.g., cable plugged in, Wi-Fi associated). Crucially, you need bothUPandLOWER_UPfor the interface to be truly operational.LOOPBACK: This is the loopback interface.BROADCAST,MULTICAST: Indicate support for these Layer 2 addressing modes.
mtu 1500: Maximum Transmission Unit - the largest packet size (in bytes) this interface can transmit without fragmentation. Ethernet standard is often 1500.qdisc fq_codel: Queuing discipline - how the kernel manages outgoing packets. Not usually critical for basic debugging.state UP: The overall operational state of the interface.UPmeans it's ready to use. Other states includeDOWN,UNKNOWN.link/ether 02:42:ac:11:00:02: The Layer 2 hardware address, also known as the MAC (Media Access Control) address. This is unique to the physical network card (usually).brd ff:ff:ff:ff:ff:ffis the broadcast MAC address.inet 172.17.0.2/16: This line shows the assigned IPv4 address.172.17.0.2: The actual IPv4 address./16: The subnet mask in CIDR notation./16corresponds to255.255.0.0, defining the size of the local network.brd 172.17.255.255: The broadcast address for this subnet.scope global: Indicates this address is valid system-wide (other scopes includehostfor loopback,linkfor link-local addresses used only on the immediate network segment).
inet6 fe80::42:acff:fe11:2/64: This line shows an assigned IPv6 address.fe80::...: This is a link-local IPv6 address, automatically configured and only usable on the local network segment. Globally routable IPv6 addresses typically start with other prefixes (like2001:...)./64: The IPv6 prefix length, defining the subnet size.scope link: Confirms this is a link-local address.
When debugging, you primarily check if the relevant interface is UP and LOWER_UP, and if it has the expected inet (IPv4) or inet6 (global scope) address assigned.
Transport Protocols (Layer 4): TCP and UDP
Once an IP address gets your data packets to the correct destination machine, Layer 4 protocols take over to deliver that data to the specific application waiting for it. The two major protocols here are TCP and UDP.
TCP (Transmission Control Protocol) acts like a reliable courier service for your data. Before sending anything substantial, it establishes aconnection with the receiving end using a handshake protocol. This ensures both sides are ready and agree to communicate. Once the connection is up, TCP manages the data flow, breaking large chunks into numbered segments, ensuring they arrive in the correct order, and retransmitting any segments that get lost or corrupted along the way. This reliability makes TCP ideal for applications where data integrity and order are critical, such as loading web pages (HTTP/HTTPS), sending emails (SMTP), transferring files (FTP), or maintaining a persistent remote connection (SSH). However, this management comes at the cost of increased overhead and latency compared to UDP.
UDP (User Datagram Protocol), in contrast, operates more like the postal service for postcards. It's a connectionless protocol, meaning it bundles data into packets (datagrams) and sends them off towards the destination IP address and port without any prior negotiation or handshake. UDP makes a "best effort" attempt to deliver the data but provides no guarantees. Packets might arrive out of order, get duplicated, or never arrive at all, and UDP itself won't try to fix these issues. This approach results in lower overhead and latency than TCP, making UDP suitable for applications where speed is important and occasional data loss can be tolerated or handled by the application itself. Common examples include DNS lookups (where a quick request-response is needed, and the client can just retry if needed), DHCP (assigning IP addresses), live video and audio streaming (where retransmitting old data is pointless), and many online games (where timely updates are more important than guaranteed delivery of every single packet).
Ports and Sockets
Whether using TCP or UDP, applications need a way to distinguish themselves from other services running on the same machine. This is achieved using port numbers, ranging from 0 to 65535. Many common services use "well-known" ports (e.g., HTTP on TCP port 80, HTTPS on TCP port 443, DNS on UDP/TCP port 53). The specific combination of an IP address, a transport protocol (TCP or UDP), and a port number forms a unique communication endpoint known as a socket (e.g., 172.17.0.2 using TCP on port 443). When troubleshooting, verifying that the service you're trying to reach is actually listening on the expected protocol and port number on the server side is important.
Basic Connectivity Testing
Having confirmed your machine possesses valid IP addresses (using ip addr show), the next logical step in troubleshooting is to test whether you can communicate with other devices, both locally and across the internet. Two command-line tools, ping and traceroute, operate primarily at the Network Layer (Layer 3) and are commonly used for connectivity testing..
Checking Reachability with ping
The ping command is allows you to check basic network reachability. Its function is simple: it sends special network packets to a specified destination host. If the destination host is reachable and configured to respond (most are, unless blocked by a firewall), it will send back a reply packet. Receiving these replies confirms that a Layer 3 path exists between your machine and the target.
You use ping by simply providing the hostname or IP address you want to test:
# Ping Google's public DNS server by IP address
$ ping 8.8.8.8
PING 8.8.8.8 (8.8.8.8) 56(84) bytes of data.
64 bytes from 8.8.8.8: icmp_seq=1 ttl=116 time=12.5 ms
64 bytes from 8.8.8.8: icmp_seq=2 ttl=116 time=12.2 ms
64 bytes from 8.8.8.8: icmp_seq=3 ttl=116 time=13.1 ms
^C  # Press Ctrl+C to stop
--- 8.8.8.8 ping statistics ---
3 packets transmitted, 3 received, 0% packet loss, time 2003ms
rtt min/avg/max/mdev = 12.238/12.616/13.112/0.371 ms

# Ping a hostname (requires DNS to work first)
$ ping google.com
PING google.com (142.250.191.174) 56(84) bytes of data.
64 bytes from lga34s35-in-f14.1e100.net (142.250.191.174): icmp_seq=1 ttl=116 time=11.8 ms
... (Ctrl+C to stop) ...
Here is what the output means:
64 bytes from ...: This indicates a successful reply was received.icmp_seq=N: The sequence number of the packet. Should increment steadily. Gaps indicate lost packets.ttl=N: Time To Live. A value decremented by each router hop; helps prevent infinite loops. Not usually critical for basic debugging, but very low values on replies might indicate a close-by host.time=X ms: Round Trip Time (RTT) or latency – how long it took for the request to go out and the reply to come back. This is a crucial measure of network performance.- Statistics (
--- ... ping statistics ---): Summarizes the test after you stop it (Ctrl+C). Look closely at packet loss %. Any loss indicates a potential network problem. - Error Messages:
Request timed outor100% packet loss: No replies were received. The host might be down, unreachable, or a firewall might be blocking the ping requests or replies.Destination Host Unreachable: A router along the path reported that it doesn't know how to reach the destination network or host. This often points to a routing issue closer to your end or the destination's end.
To diagnose issues systematically, you can try to use ping in a specific order, moving outwards from your own machine:
ping 127.0.0.1(orping localhost): Tests your machine's own network stack. If this fails, there's a fundamental problem with your OS networking setup.ping <your_own_IP>: Tests your specific network interface configuration. Should work if step 1 works.ping <your_gateway_IP>: Tests connectivity to your local router (the "gateway" connecting your local network to others). Find your gateway usingip route show | grep default. Failure here points to a problem on your immediate local network (Wi-Fi, switch, router itself).ping 8.8.8.8(or another reliable external IP): Tests basic internet connectivity beyond your local network. If this fails but the gateway ping works, the issue is likely with your router's internet connection or your ISP.ping <target_hostname>(e.g.,ping google.com): Tests both internet connectivity and basic DNS name resolution. Ifping 8.8.8.8works butping google.comfails, suspect a DNS problem (which we'll cover in the next lecture).
Note: For testing IPv6 connectivity, use the ping6 command (or sometimes ping -6).
Discovering the Path with traceroute
While ping tells you if you can reach a destination, traceroute (and similar tools like tracepath or mtr) attempts to show you the path your packets take to get there. It reveals the sequence of routers (or "hops") between your machine and the target. This is useful for identifying where a connection is failing or where significant delays are occurring.
$ traceroute google.com
traceroute to google.com (142.250.191.174), 30 hops max, 60 byte packets
 1  _gateway (192.168.1.1)  0.530 ms  0.480 ms  0.465 ms  # Hop 1: Your local router
 2  10.x.x.x (10.x.x.x)  8.120 ms  8.050 ms  7.995 ms   # Hop 2: ISP Router 1
 3  another-isp-router.net (A.B.C.D)  9.500 ms  9.450 ms  9.400 ms # Hop 3: ISP Router 2
 4  * * *                                                # Hop 4: No reply / Timeout
 5  some-backbone-router.net (E.F.G.H)  15.200 ms  15.150 ms  15.100 ms # Hop 5
 ... (more hops) ...
12  lga34s35-in-f14.1e100.net (142.250.191.174)  11.900 ms  11.850 ms  11.800 ms # Final destination
Interpreting traceroute output:
- Each numbered line represents a hop (a router).
- It usually shows the hostname (if resolvable) and IP address of the router.
- The three time values (e.g.,
0.530 ms 0.480 ms 0.465 ms) are the RTTs for three separate probes sent to that hop. Consistent times are good; large variations might indicate instability. * * *: This means no reply was received from that hop within the timeout period. This could be due to network congestion, packet loss, or (very commonly) a router configured not to send ICMP Time Exceeded messages (often for security reasons). A few asterisks are not always a problem, especially if the trace completes, but a long string of them, or if the trace stops there, indicates a likely point of failure or blocking.- Latency Jumps: Look for sudden, significant increases in the RTT between consecutive hops. This can pinpoint a slow link or congested router along the path.
Alternatives like tracepath often provide slightly simpler output, and mtr (My Traceroute) is a very powerful tool that continuously sends probes like ping to each hop identified by traceroute, giving you a live view of latency and packet loss along the entire path. It's excellent for diagnosing intermittent issues.
By using ping to check basic reachability and traceroute to inspect the path, you gain insights into Layer 3 connectivity. If ping fails, you can isolate whether the issue is local, with your gateway, your ISP, or potentially DNS. If ping works but connections are slow or unreliable, traceroute or mtr can help pinpoint the segment of the network path responsible for the delay or packet loss.
Understanding DNS (Name Resolution)
Computers communicate using numerical IP addresses, but humans prefer names like www.google.com. The Domain Name System (DNS) acts as the internet's phonebook, translating these human-friendly names into computer-friendly IP addresses. This translation, called name resolution, is critical as without it, you couldn't easily browse the web or access most online services.
The resolution process typically involves checking a local cache first, then asking a configured DNS resolver (often provided by your ISP or specified manually, visible in /etc/resolv.conf). This resolver then performs a recursive query and asks finally the authoritative name server responsible for the specific domain you requested.
The primary tool for interacting with DNS from the command line is dig (Domain Information Groper):
# Find the IPv4 address (A record) for a hostname
$ dig A www.google.com +short
142.250.191.142

# Find the IPv6 address (AAAA record)
$ dig AAAA www.google.com +short
2607:f8b0:4004:834::200e

# Trace the full recursive lookup path (very useful for debugging!)
$ dig +trace www.google.com
# (Output shows queries to root, .com, google.com servers)

# Query a specific DNS server (e.g., Google's public DNS)
$ dig @8.8.8.8 A www.stanford.edu +short
171.67.215.200
When debugging, if ping <IP> works but ping <hostname> fails, DNS is the prime suspect. Use dig to check if the name resolves correctly, if it returns the expected IP, or if the query times out. Also, be aware that organizations often run internal DNS servers (like with Active Directory) to resolve private hostnames not known to the public internet. Ensure you're using the appropriate DNS resolver for the name you're trying to look up.
Network Boundaries: NAT, Firewalls & Proxies
Your computer's network connection rarely connects directly to the public internet without intermediaries. Understanding these boundaries is crucial for debugging.
Private IPs & NAT: Most devices on home, university, or corporate networks use private IP addresses (ranges like 10.x.x.x, 172.16.x.x to 172.31.x.x, 192.168.x.x). These are not routable on the public internet. Your router performs Network Address Translation (NAT), translating your device's private IP address into the router's single public IP address when sending traffic out, and doing the reverse for incoming traffic. You can see your private IP with ip addr show and find your public IP (as seen by the outside world) using a service like curl ifconfig.me. NAT usually works transparently but can complicate hosting services or peer-to-peer connections.
Firewalls: These act as security guards for networks or individual hosts, filtering traffic based on defined rules (e.g., blocking incoming connections on specific ports unless explicitly allowed). Firewalls can exist on your own machine (e.g., ufw on Ubuntu, firewalld on CentOS/Fedora, Windows Firewall), on your network router, or as dedicated appliances or cloud services (like AWS Security Groups). If you can ping a host but cannot connect to a specific service (e.g., a web server on port 80), a firewall is a very likely culprit. Check the firewall rules on both the client and server sides. Basic host firewall status can often be checked with commands like sudo ufw status.
Proxies: A proxy server acts as an intermediary for your network requests. Instead of connecting directly, your traffic goes to the proxy, which then forwards it to the destination. Proxies are used for various reasons like caching web content, filtering traffic, enhancing security, or bypassing regional restrictions. In corporate or university environments, you might be required to configure your system or applications (often via environment variables like HTTP_PROXY and HTTPS_PROXY) to use a proxy. If connections fail inexplicably, check if a proxy is involved and if it's configured correctly; the proxy itself could be down or misconfigured.
Securing Communications
Transmitting data "in the clear" over networks is insecure, making it vulnerable to eavesdropping (confidentiality breach) and modification (integrity breach). Several mechanisms add security:
- HTTPS (HTTP Secure): This is standard HTTP layered over TLS/SSL (Transport Layer Security/Secure Sockets Layer) encryption. It encrypts web traffic between your browser and the server, protecting sensitive data like logins and credit card numbers. It also uses digital certificates to help verify the server's identity. You see it as the padlock icon in your browser's address bar. Operates at Layers 6/7.
- VPN (Virtual Private Network): Creates an encrypted "tunnel" between your device and a VPN server, typically encrypting all your network traffic over that tunnel. This protects your data on untrusted networks (like public Wi-Fi) and can make your traffic appear to originate from the VPN server's location/IP address. Often operates at Layer 3.
Talking Directly to Web Services (curl)
Sometimes, it's useful to bypass the complexities of a web browser and interact directly with web services at the HTTP level. The curl command is an incredibly powerful and versatile tool for this. It lets you make HTTP requests, view responses, and diagnose application-level issues.
Here are some essential curl uses for debugging:
# Simple GET request (shows response body)
$ curl http://example.com

# Verbose output (-v): Shows connection details, request/response headers! CRUCIAL!
$ curl -v https://api.github.com/users/octocat
*   Trying 140.82.121.4:443...          # DNS resolved, attempting TCP connection
* Connected to api.github.com (...) port 443 (#0) # TCP connection successful
* ALPN, offering h2/http1.1
* TLSv1.3 (OUT), TLS handshake (...)     # TLS negotiation details...
* SSL connection using TLSv1.3 / ...
> GET /users/octocat HTTP/1.1            # > Shows request headers sent by curl
> Host: api.github.com
> User-Agent: curl/7.81.0
> Accept: */*
>
* Mark bundle as not supporting multiuse
< HTTP/1.1 200 OK                       # < Shows response status line & headers
< server: GitHub.com
< content-type: application/json; charset=utf-8
< ... (other headers) ...
<
{                                       # Response body starts here
  "login": "octocat",
  "id": 583231,
  ...
}
* Connection #0 to host api.github.com left intact # Connection closed/reused

# Show only response headers (-I, uses HEAD request)
$ curl -I https://google.com

# Make a POST request with JSON data
$ curl -X POST -H "Content-Type: application/json" \
  -d '{"name":"New Item", "value":123}' \
  http://httpbin.org/post
Using curl -v is usefu because it shows:
- If the DNS resolution succeeded (
Trying ...). - If the TCP connection was established (
Connected to ...). - If the TLS handshake (for HTTPS) completed successfully (
SSL connection using ...). - The exact HTTP request headers
curlsent (>). - The HTTP status code and response headers received from the server (
<). (e.g.,200 OK,404 Not Found,500 Internal Server Error). - The response body (unless using
-I).
This allows you to quickly pinpoint whether a failure occurs at the connection level, during the TLS negotiation, or if the server is returning an application-specific error status code.
Checking Listening Services (ss)
When debugging why you can't connect to a service (like a web server or database you're running), you need to verify if the service is actually running on the server and listening for incoming connections on the expected network interface and port. The ss (socket statistics) command is the modern tool for this on Linux (replacing the older netstat).
The most useful invocation for this purpose is:
ss -tulnp
Let's break down those options:
-t: Show TCP sockets.-u: Show UDP sockets.-l: Show only Listening sockets (sockets waiting for incoming connections).-n: Show Numeric addresses and ports (don't try to resolve names, faster and often clearer).-p: Show the Process (program name and PID) that owns the socket. (Often requiressudoto see processes owned by other users).
Example Output:
$ sudo ss -tulnp
State    Recv-Q   Send-Q     Local Address:Port       Peer Address:Port   Process
LISTEN   0        4096       127.0.0.53%lo:53          0.0.0.0:*          users:(("systemd-resolve",pid=638,fd=13))    # DNS resolver listening locally
LISTEN   0        128            0.0.0.0:22          0.0.0.0:*          users:(("sshd",pid=870,fd=3))               # SSH daemon listening on all IPv4 interfaces
LISTEN   0        511            0.0.0.0:80          0.0.0.0:*          users:(("nginx",pid=1234,fd=6))             # Nginx web server listening on port 80 (IPv4)
LISTEN   0        128               [::]:22             [::]:*          users:(("sshd",pid=870,fd=4))               # SSH daemon listening on all IPv6 interfaces
LISTEN   0        511               [::]:80             [::]:*          users:(("nginx",pid=1234,fd=7))             # Nginx web server listening on port 80 (IPv6)
- State: Must be
LISTEN. - Local Address:Port: Does this match the IP address and port you expect the service to be listening on?
0.0.0.0:<port>means listening on that port on all available IPv4 interfaces.[::]:<port>means listening on that port on all available IPv6 interfaces.127.0.0.1:<port>means listening only for connections originating from the local machine itself.<specific_IP>:<port>means listening only on that specific IP address.
- Process: Does the process name match the server application you expect (e.g.,
nginx,httpd,postgres,python)?
If the service you're trying to connect to doesn't appear in the ss -tulnp output, it's either not running or it's misconfigured and not listening on the network as expected.
HyperText Transfer Protocol (HTTP)
The HyperText Transfer Protocol, commonly known as HTTP, serves as the communication protocol for the World Wide Web. It operates at the Application Layer (Layer 7) of the network stack. HTTP follows a request response model: a client, typically your web browser, sends a request message to a server asking for a resource, and the server sends back a response message, often containing the requested resource or information about the request's outcome.
HTTP Request
Every time your browser needs something from a web server, it constructs an HTTP request. This request has several parts:
- Method (or Verb): This specifies the action the client wants the server to perform on the resource. Common methods include:
GET: Retrieve a resource.POST: Submit data to be processed to a specified resource, often causing a change in state or side effects on the server (like submitting a form or creating a new user).PUT: Replace the target resource with the request payload.DELETE: Remove the specified resource.HEAD: Similar toGET, but asks for only the response headers, not the actual resource body. Useful for checking if a resource exists or getting metadata without downloading the content.
- Path (URI/URL): This identifies the specific resource the client is interested in on the server. It's the part of the web address that comes after the domain name, such as
/about-us.htmlor/api/products/42. - HTTP Version: Indicates which version of the HTTP protocol the client is using, for example,
HTTP/1.1orHTTP/2. - Headers: These are key value pairs that provide additional information or metadata about the request. Some common examples include:
Host: Specifies the domain name of the server. Example:Host: www.example.comUser-Agent: Identifies the client software making the request (e.g., browser type and version). Example:User-Agent: Mozilla/5.0 (Windows NT 10.0; Win64; x64) AppleWebKit/537.36 (KHTML, like Gecko) Chrome/123.0.0.0 Safari/537.36Accept: Tells the server what content types the client can understand. Example:Accept: text/html,application/xhtml+xml,application/xml;q=0.9,image/webp,*/*;q=0.8Content-Type: Specifies the media type of the request body (used withPOSTorPUT). Example:Content-Type: application/jsonAuthorization: Carries credentials for authenticating the client with the server. Example:Authorization: Bearer your_token_here
- Body (Optional): This part contains the data being sent to the server, typically used with methods like
POSTorPUT. For instance, when you submit a login form, the username and password might be sent in the request body. If you are interacting with a web API, the body might contain data formatted in JSON. Example JSON body:{"username": "alice", "email": "alice@example.com"}
Here's a simplified example of a GET request:
GET /index.html HTTP/1.1
Host: www.example.com
User-Agent: MySimpleBrowser/1.0
Accept: text/html
HTTP Response
After receiving and processing a request, the server sends back an HTTP response. This response mirrors the request structure in some ways:
- HTTP Version: The protocol version the server is using.
- Status Code: A three digit numerical code indicating the result of the request. We'll explore these codes further below.
- Reason Phrase: A short, human readable text description accompanying the status code. For example,
OKfor status code200. - Headers: Key value pairs providing metadata about the response. Common response headers include:
Content-Type: Specifies the media type of the resource being sent in the response body. Example:Content-Type: text/html; charset=UTF-8Content-Length: Indicates the size of the response body in bytes. Example:Content-Length: 1234Set-Cookie: Instructs the client to store a cookie. Example:Set-Cookie: sessionID=xyz789; HttpOnly; Path=/Location: Used in redirection responses (like301or302) to tell the client where to find the resource. Example:Location: https://www.newexample.com/
- Body (Optional): Contains the actual resource requested (like HTML code, an image file, or JSON data) or details about an error if the request failed. Responses to
HEADrequests or status codes like204 No Contentintentionally omit the body.
Here's a simplified example of a successful response to the previous GET request:
HTTP/1.1 200 OK
Content-Type: text/html; charset=UTF-8
Content-Length: 150
Date: Tue, 29 Apr 2025 20:11:00 GMT

<html>
<head><title>Example Page</title></head>
<body>
<h1>Hello!</h1>
<p>This is a simple example page.</p>
</body>
</html>
Status Codes
HTTP status codes help with understanding the outcome of a request. They are grouped into five categories based on their first digit:
- 1xx (Informational): The request was received, and the process is continuing. These are rarely encountered in typical web Browse or API interactions.
- 2xx (Success): The request was successfully received, understood, and accepted.
200 OKis the standard code for a successful request. The requested data is usually in the response body.201 Createdtypically follows aPOSTrequest that successfully created a new resource on the server.204 No Contentsignifies success, but there's no data to return in the body. This is often used forDELETErequests orPUTupdates that don't need to send data back.
- 3xx (Redirection): Further action needs to be taken by the client to complete the request, usually involving navigating to a different URL.
301 Moved Permanentlyindicates the requested resource has permanently moved to a new URL, provided in theLocationheader. Clients and search engines should update their links.302 Found(or307 Temporary Redirect) means the resource is temporarily at a different URL, also given in theLocationheader. Clients should continue using the original URL for future requests.304 Not Modifiedis used for caching. It tells the client that the resource hasn't changed since the last request, so the client can use its cached version.
- 4xx (Client Error): The request contains bad syntax or cannot be fulfilled, likely due to an error on the client's side.
400 Bad Requestsuggests the server could not understand the request due to malformed syntax (e.g., invalid characters, missing required parts).401 Unauthorizedmeans authentication is required, and the client either hasn't provided credentials or the provided credentials are invalid.403 Forbiddenindicates that the server understood the request but refuses to authorize it. Unlike401, authentication won't necessarily help; the client simply doesn't have permission to access the resource.404 Not Foundis perhaps the most famous code; the server cannot find the requested resource at the specified URL.
- 5xx (Server Error): The server failed to fulfill an apparently valid request due to an internal issue.
500 Internal Server Erroris a generic code indicating an unexpected condition on the server prevented it from fulfilling the request (e.g., a bug in the server-side code).502 Bad Gatewayusually occurs when a server acting as a gateway or proxy received an invalid response from an upstream server it needed to query.503 Service Unavailablemeans the server is temporarily unable to handle the request, often because it's overloaded or down for maintenance.
Web APIs
Instead of responding with HTML meant for display, a web API endpoint might respond with structured data, commonly in JSON (JavaScript Object Notation) format, intended for consumption by another program. For example, a mobile weather app likely communicates with a weather service's API over HTTP. The app sends a GET request to an API endpoint like /api/weather?location=CollegeParkMD, and the server responds with JSON data like {"temperature": 75, "condition": "Sunny", "unit": "F"}. The app then parses this JSON data and displays it to the user.
Web APIs use the same HTTP principles: methods (GET, POST, PUT, DELETE), status codes, headers, and optionally request/response bodies. Understanding HTTP is therefore essential for working with or building systems that rely on APIs. Many modern web applications heavily use APIs internally, even for their own front end interfaces (built with frameworks like React, Angular, Vue), to dynamically load data and update the user interface without full page reloads.
Browser Developer Tools
For anyone working with web technologies, the browser's built in Developer Tools are solid. You can usually open them by pressing F12 or right clicking on a webpage and selecting "Inspect" or "Inspect Element".
Within these tools, the Network Tab is particularly powerful for understanding HTTP communication. It records every network request initiated by the webpage as it loads and runs. This includes requests for the main HTML document, CSS stylesheets, JavaScript files, images, fonts, and data requests made via JavaScript.
For each recorded request, the Network Tab typically shows:
- The requested URL.
- The HTTP Method used (e.g.,
GET,POST). - The Status Code returned by the server (e.g.,
200,404). Errors (4xx, 5xx codes) are often highlighted, perhaps in red, making them easy to spot. - The Type of resource requested (e.g., document, script, stylesheet, xhr).
- The Size of the response.
- The Time taken for the request.